
In part 3 of the series we looked at how to implement Shared Element Transitions when using Picasso or Glide.
In part 4 we're going to look at implementing them with RecyclerView, a popular use case with apps that have Shared Element Transitions. An example of this is Google Play Music, which i mentioned in part 1, but there are plenty more out there. Pocket Casts is another good example:
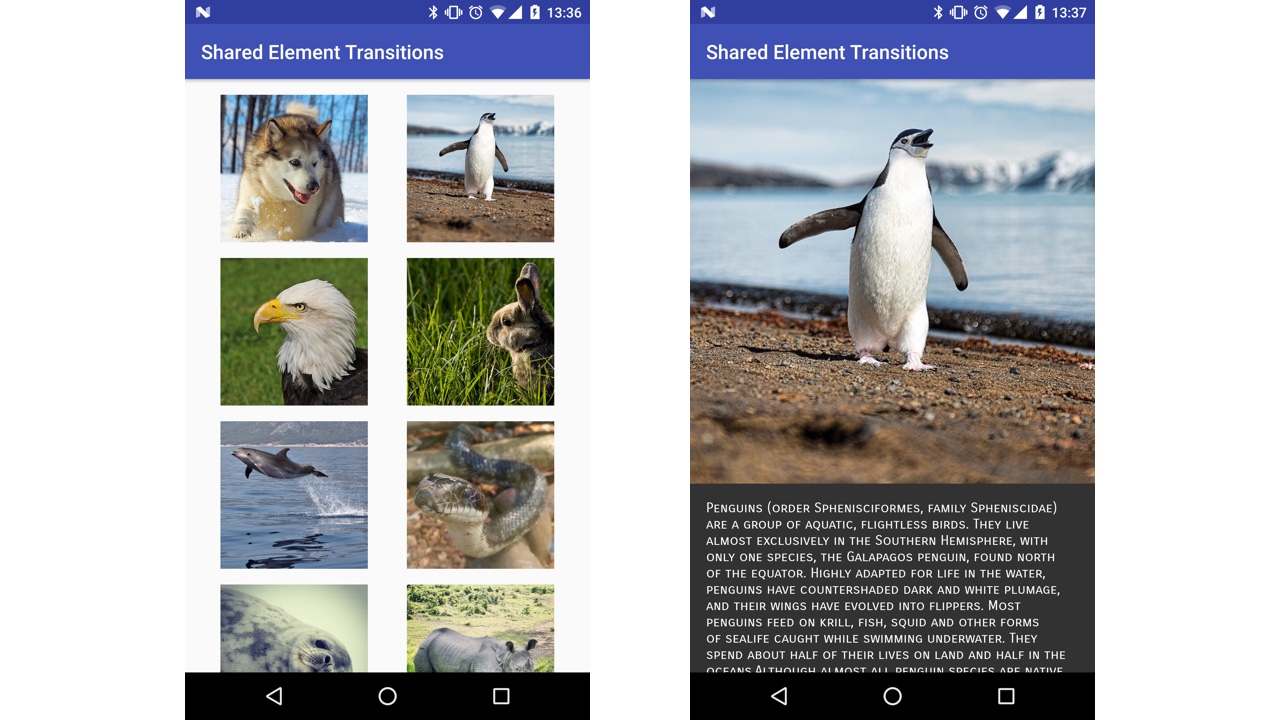
We're going to make something similar, going from a gallery of Animals to a detail page telling us a bit more info. Here's our two screens:
I'm going to show three examples. Two using Activity and Fragment to go from a RecyclerView to a simple detail view. Finally one going from a RecyclerView to a ViewPager.
There's one key point that I want to get across, in case you decide to skip to other parts of the post. That is that Shared Element Transitions need a UNIQUE transition name. This is easy to forget but is key when doing them with RecyclerView. Enough chuff, let's get on with it!
Common Code
First of all lets look at some common code to all the examples. Let's start with the layout for the gallery items.
Animal Gallery Item Layout
<?xml version="1.0" encoding="utf-8"?>
<RelativeLayout xmlns:android="http://schemas.android.com/apk/res/android"
    android:layout_width="match_parent"
    android:layout_height="150dp"
    android:layout_marginBottom="16dp">

    <ImageView
        android:id="@+id/item_animal_square_image"
        android:layout_width="match_parent"
        android:layout_height="match_parent" />

</RelativeLayout>
Nothing fancy, but the key thing to note is there is NO transitionName attribute set on the ImageView.
Animal Gallery Adapter
public class AnimalGalleryAdapter extends RecyclerView.Adapter<AnimalGalleryAdapter.ImageViewHolder> {

    private final AnimalItemClickListener animalItemClickListener;
    private ArrayList<AnimalItem> animalItems;

    public AnimalGalleryAdapter(ArrayList<AnimalItem> animalItems, AnimalItemClickListener animalItemClickListener) {
        this.animalItems = animalItems;
        this.animalItemClickListener = animalItemClickListener;
    }

    ....

    @Override
    public void onBindViewHolder(final ImageViewHolder holder, int position) {
        final AnimalItem animalItem = animalItems.get(position);

        Picasso.with(holder.itemView.getContext())
                .load(animalItem.imageUrl)
                .into(holder.animalImageView);

        ViewCompat.setTransitionName(holder.animalImageView, animalItem.name);

        holder.itemView.setOnClickListener(new View.OnClickListener() {
            @Override
            public void onClick(View v) {
                animalItemClickListener.onAnimalItemClick(holder.getAdapterPosition(), animalItem, holder.animalImageView);
            }
        });
    }
}
Here we have our AnimalGalleryAdapter. This will be used throughout all the examples to show the gallery images.
On line 6 in the constructor we ask for an AnimalItemClickListener which will handle calling back to the relevant Activity or Fragment to launch the animal detail screen.
The onBindViewHolder method is where we set the transitionName. As previously mentioned, this has to be unique in the view hierarchy, so we construct one with an arbitrary string and append the position of the item onto the end. use the Animal's name as we know this will be unique. It's best if you can use some unique identifier derived from your model. If we set the transitionName in XML then all ImageView in the gallery would have the same one, which means when we came back to the gallery the framework would have no idea where to move the image to. Which results in some weird image movement and clashing! Line 21 we set the transitionName on the ImageView using ViewCompat. Line 23 we set the dynamic transitionName on the ImageView.
We fire onAnimalItemClick on line 26 when an image is tapped. We give it the position, the AnimalItem that was clicked, and finally the ImageView. and finally We can use transitionName. The transitionName isn't entirely necessary as we set it on the ImageView, but it help keeps the code cleaner as calling getTransitionName on an ImageView is only available 21+.ViewCompat to call getTransitionName on the ImageView as we have done in previous examples.
Animal Item
public class AnimalItem implements Parcelable {

    public String name;
    public String detail;
    public String imageUrl;

    ...
}
Our AnimalItem is pretty simple. We need the image URL to tell Picasso (can easily be swapped for Glide) what image to load in our detail Activity or Fragment. It's also Parcelable so we can pass on through by adding to the extras Bundle of the Intent.
RecyclerView to Activity
This is probably the most simple to implement. In our RecyclerViewActivity we just need to handle the onAnimalItemClick and launch the AnimalDetailActivity.
public class RecyclerViewActivity extends AppCompatActivity implements AnimalItemClickListener {

    //Code to setup the RecyclerView and Adapter

    @Override
    public void onAnimalItemClick(int pos, AnimalItem animalItem, ImageView sharedImageView) {
        Intent intent = new Intent(this, AnimalDetailActivity.class);
        intent.putExtra(EXTRA_ANIMAL_ITEM, animalItem);
        intent.putExtra(EXTRA_ANIMAL_IMAGE_TRANSITION_NAME, ViewCompat.getTransitionName(sharedImageView));

        ActivityOptionsCompat options = ActivityOptionsCompat.makeSceneTransitionAnimation(
                this,
                sharedImageView,
                ViewCompat.getTransitionName(sharedImageView));

        startActivity(intent, options.toBundle());
    }

}
Line 8 and 9 we put our AnimalItem and transitionName in the Bundle to be passed through to the AnimalDetailActivity. Line 11-14 we do what we did in part 1 and create ActivityOptions using the ImageView passed through from the AnimalGalleryAdapter. and the We add the transitionName.ActivityOptions when we call startActivity on line 16.
Now we need to setup the AnimalDetailActivity.
public class AnimalDetailActivity extends AppCompatActivity {

    @Override
    protected void onCreate(Bundle savedInstanceState) {
        super.onCreate(savedInstanceState);
        setContentView(R.layout.activity_animal_detail);
        supportPostponeEnterTransition();

        Bundle extras = getIntent().getExtras();
        AnimalItem animalItem = extras.getParcelable(RecyclerViewActivity.EXTRA_ANIMAL_ITEM);

        ImageView imageView = (ImageView) findViewById(R.id.animal_detail_image_view);
        TextView textView = (TextView) findViewById(R.id.animal_detail_text);
        textView.setText(animalItem.detail);

        String imageUrl = animalItem.imageUrl;
        if (Build.VERSION.SDK_INT >= Build.VERSION_CODES.LOLLIPOP) {
            String imageTransitionName = extras.getString(RecyclerViewActivity.EXTRA_ANIMAL_IMAGE_TRANSITION_NAME);
            imageView.setTransitionName(imageTransitionName);
        }

        Picasso.with(this)
                .load(imageUrl)
                .noFade()
                .into(imageView, new Callback() {
                    @Override
                    public void onSuccess() {
                        supportStartPostponedEnterTransition();
                    }

                    @Override
                    public void onError() {
                        supportStartPostponedEnterTransition();
                    }
                });
    }
}
We need to stop the AnimalDetailActivity loading before Picasso has finished loading the image from the image url. So line 7 we call supportPostponeEnterTransition to tell it to wait. Line 19 we get the transitionName from the extras and set it on the ImageView of the AnimalDetailActivity. This is key, as we DON'T set the transitionName in the layout XML of the AnimalDetailActivity. This is because we don't know it until someone has actually clicked an Animal from the gallery. So we have to set it dynamically. It's not necessary though, and if you wanted you could set this on the ImageView via the layout if you like, but you'd need to set it when creating the ActivityOptionsCompat in RecyclerViewActivity. Line 23-36 we use Picasso to load the image and in the onSuccess and onError methods of the callback we tell the AnimalDetailActivity that it can now launch by calling supportStartPostponedEnterTransition. This was talked about in detail in part 3. With that everything should work!
RecyclerView to Fragment
There's not too much difference between using a Fragment compared with the above code for the Activity example. So I'm just going to touch on the key differences. Here's our RecyclerViewFragment which gets loaded from the Activity that holds the Fragments.
public class RecyclerViewFragment extends Fragment implements AnimalItemClickListener {

    //Code to setup RecyclerView and Adapter

    @Override
    public void onAnimalItemClick(int pos, AnimalItem animalItem, ImageView sharedImageView, String transitionName) {
        Fragment animalDetailFragment = AnimalDetailFragment.newInstance(animalItem, transitionName);
        getFragmentManager()
                .beginTransaction()
                .addSharedElement(sharedImageView, ViewCompat.getTransitionName(sharedImageView))
                .addToBackStack(TAG)
                .replace(R.id.content, animalDetailFragment)
                .commit();
    }
}
In the onAnimalItemClick method we create our FragmentTransaction. On line 10 we add the ImageView and dynamic that has been passed through from the transitionNameAnimalGalleryAdapter. We use it to get the transitionName. Just like the Activity example, we need to pass through our AnimalItem and transitionName which we do when creating our Fragment on line 7.
public class AnimalDetailFragment extends Fragment {

    @Override
    public void onCreate(@Nullable Bundle savedInstanceState) {
        super.onCreate(savedInstanceState);
        postponeEnterTransition();
        if (Build.VERSION.SDK_INT >= Build.VERSION_CODES.LOLLIPOP) {
            setSharedElementEnterTransition(TransitionInflater.from(getContext()).inflateTransition(android.R.transition.move));
        }
    }

    @Override
    public void onViewCreated(View view, @Nullable Bundle savedInstanceState) {
        super.onViewCreated(view, savedInstanceState);

        AnimalItem animalItem = getArguments().getParcelable(EXTRA_ANIMAL_ITEM);
        String transitionName = getArguments().getString(EXTRA_TRANSITION_NAME);

        TextView detailTextView = (TextView) view.findViewById(R.id.animal_detail_text);
        detailTextView.setText(animalItem.detail);

        ImageView imageView = (ImageView) view.findViewById(R.id.animal_detail_image_view);
        if (Build.VERSION.SDK_INT >= Build.VERSION_CODES.LOLLIPOP) {
            imageView.setTransitionName(transitionName);
        }

        Picasso.with(getContext())
                .load(animalItem.imageUrl)
                .noFade()
                .into(imageView, new Callback() {
                    @Override
                    public void onSuccess() {
                        startPostponedEnterTransition();
                    }

                    @Override
                    public void onError() {
                        startPostponedEnterTransition();
                    }
                });
    }
}
Again, just like the Activity example we have to tell the Fragment to wait to load until we tell it so by calling postponeEnterTransition() on line 7. Line 9 we call setSharedElementTransition() otherwise we won't get one and we just inflate the transition move from the Android resources to tell it what type of Transition we want.
Line 25 we set the transitionName on the ImageView. as it's dynamic. Like the Actvivity example, this isn't necessary and we could just set a transitionName via XML and then use it here. We load the image using Picasso (28-41) and make sure we call startPostponedEnterTransition() in the image load callback's onSuccess() and OnError() methods so that the Fragment actually loads.
So as you can see, apart from the Fragment specific calls, the Activity and Fragment examples are both pretty much the same. I won't post a video as it's identical to the one above for the Activity!
Bonus: RecyclerView to ViewPager
I was asked about this scenario last week and so I've decided to throw it in as well. There's just one caveat to this example. As you'll likely know the nature of a ViewPager is that you can swipe to change pages. This proves an issue with a Shared Element Transition's return transition. You might have moved in the ViewPager and no longer have the View you did the Shared Element Transition with in the first place. If you do there's also the chance you'll be on an adjacent page, so when you press back the first image transitions back rather than the one that you are on. Take a look at the video to see what I mean.
There's hardly any difference in code to the above Fragment example apart from using a ViewPager and this little snippet:
public class AnimalViewPagerFragment extends Fragment {

    ///Other setup code

    @Override
    public void onCreate(@Nullable Bundle savedInstanceState) {
        super.onCreate(savedInstanceState);
        postponeEnterTransition();
        if (Build.VERSION.SDK_INT >= Build.VERSION_CODES.LOLLIPOP) {
            setSharedElementEnterTransition(TransitionInflater.from(getContext()).inflateTransition(android.R.transition.move));
        }
        setSharedElementReturnTransition(null);
    }
}
On line 12 we call setSharedElementReturnTransition() and set it to null so that it doesn't perform a return Shared Element Transition. This way, when the back buttons pressed, there'll be no odd return transition. If you know a way round this I'd be keen to hear, I have a few ideas myself but I ran out of time this week to try them! Note I'm calling this on the Fragment that's going to be created, NOT the one that's loading it. It'll look something like this:
And that's it for this week. In part 5 I'll be focusing on gotchas. We'll use some of the previous examples and get them into a state when we no longer have that nasty white flash! If you haven't seen it go back and look at some of the videos above. You'll never unsee it again! We'll also look at stopping the images overlapping the navigation and status bars.
The source code for this can be found here under the package recycler_view.
Update (5/03/17): I've made some minor adjustments to this post since first releasing. There's nothing better than having 1000's of eyes on your work for reviewing!
